


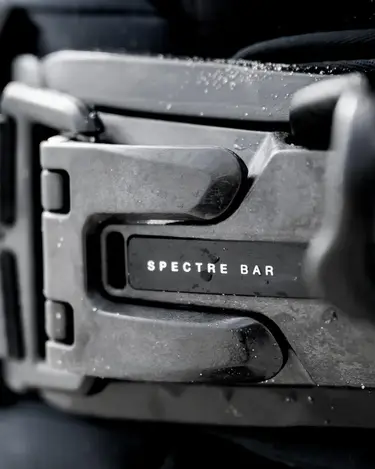
Find step-by-step instructions for replacing the hook, installing a mini rope or webbing slider, and adjusting your ION Spectre Bar. Select your model below to find the right tutorial.
Table of Content
Spectre Bar 2
Spectre Bar
How to replace the hook: Spectre Bar 2
What You'll Need:
Compatible replacement hook
Torx T20 screwdriver
Torque screwdriver (recommended)
Step-by-Step Instructions
Remove the Spreader Bar: Open the two side levers and detach the Spectre Bar 2 from your harness.
Remove the Five Screws: Use a Torx T20 screwdriver to remove the five screws on the back. Keep the screws and washers for reassembly.
Remove the Old Hook: Carefully disassemble the spreader bar and remove the damaged or worn hook.
Install the New Hook: Place the replacement hook into the center slot of the Spectre Bar 2.
Reattach the Side Wings and EVA Pad: Clip the two side wings into place. Position the EVA pad with the two recesses facing upwards, towards the hook opening.
Insert the Center Screw: Position the center washer and insert the center screw. Check that the screw still has blue threadlocker to prevent loosening.
Insert the Remaining Screws: Insert the remaining screws and washers. Tighten them lightly at first to keep all components aligned.
Tighten All Screws: Use a torque screwdriver to tighten all five screws to the recommended 2.5 Nm.
Reattach and Check the Spreader Bar: Reattach the Spectre Bar 2 to your harness. Make sure both side levers are securely closed and all components are properly installed.
Important: Only use compatible ION replacement parts. Do not use your harness if any components are damaged, loose or incorrectly installed.

INSTALLING THE MINIROPE: SPECTRE BAR 2
Step 1: Remove all five screws from the inside of your Spectre Bar 2 using a TX20 Torx driver.
Step 2: Carefully remove the pad, flaps, and hook.
Step 3: Remove the front cover by pushing the two small plastic tabs on each side of the bar.
Step 4: Replace the original cover with the enclosed replacement part.
Step 5: Make a figure-eight knot on one side oft he mini rope.
Step 6: Run the mini rope through one of the holes on the Spectre Bar 2.
Step 7: Run the mini rope back through the other hole.
Step 8: Secure it with another figure-eight knot on the inside.
Step 9: Thread the webbing slider through the Spectre Bar 2.
Step 10: If using a stanndard chicken loop, add the stainless steel ring. If using the Duotone Rope Kit, the ring is not needed.
Step 11: Place the rope cover over the webbing slider.
Step 12: Insert the two screws next to the center through the rope cover and rope.
Step 13: Tighten the screws holding the hook to 2.5Nm. Tip: you can adjust the rope length.
Step 14: Long rope: Use both inner holes. Medium rope: Use one inner and one outer hole. Short rope: Use both outer holes.
Step 15: Secure everything tightly.
Step 16: Reassemble the flaps and pad, including the washers. Fasten with the remaining three screws.

Installing the Slider: Spectre Bar 2
Step 1: Remove all five screws from the inside of your Spectre Bar 2 using a TX20 Torx driver.
Step 2: Carefully remove the pad, flaps, and hook.
Step 3: Thread the webbing slider through the Spectre Bar 2.
Step 4: If using a standard chicken loop, add the stainless steel ring. If using the Duotone Rope Kit, the ring is not needed.
Step 5: Place the rope cover over the webbing slider.
Step 6: Insert the two screws next to the center through the rope cover and rope.
Step 7: Tighten the screws holding the hook to 2.5Nm.
Step 8: Tip: You can adjust the rope length. Long rope: Use both inner holes. Medium rope: Use one inner and one outer hole. Short rope: Use both outer holes.
Step 9: Secure everything tightly.
Step 10: Reassemble the flaps and pad, including the washers. Fasten with the remaining three screws.

How to change the hook on the Spectre Bar
Step 1: Remove the three middle screws that secure the hook of the Spectre bar using a TX20 Torx
Step 2: Remove the hook from the Spectre bar
Step 3: Put the place holder back into it's original position
Step 4: Add new hook to the Spectre bar
Step 5: Put the three screws back into their original position. Make sure the longest 20mm screw is in the center

How to install the webbing slider on the Spectre Bar
Step 1: Remove all five screws from the inside of your Spectre Bar using a TX20 Torx
Step 2: Carefully, remove the pad, flaps & hook
Step 3: Assemble the hook place holder
Step 4: Run the webbing slider through the Spectre Bar
Step 5: Cut the webbing slider to your preferred length
Step 6: If you are using a standard chicken loop, add the stainless steel ring. If you are using the Duotone Rope Kit you don't need the ring
Step 7: Place the aluminium bar on top of the webbing slider
Step 8: Put the screws through the aluminium bar & through the webbing slider. Secure tightly.
Step 9: Add the hook place holder, reassemble the flaps & secure everything with the screws. Make sure to put the longest screw in the center.

How to install the webbing slider + mini rope on the Spectre Bar
Step 1: Remove all five screws from the inside of your Spectre Bar using a TX20 Torx
Step 2: Carefully, remove the pad, flaps & hook
Step 3: Remove the front cover by pushing the two small plastic tabs on each side of the bar
Step 4: Replace the original cover the the enclosed replacement part
Step 5: Make a figure-eight knot on one side of the mini rope
Step 6: Run the mini rope through one side of the aluminium bar
Step 7: Now run it through one of the holes of the Spectre Bar
Step 8: Run the mini rope back through the other hole in the Spectre Bar. Secure it with another figure-eight knot on the inside
Step 9: Install the webbing slider according the instruction (see above)

How to remove the flaps on the Spectre Bar
Step 1: Using a Torx TX20 remove the two outer screws on the inside of your Spectre Bar
Step 2: Remove the flaps by pulling them downwards
Step 3: Put both screws back in and secure them tightly
