


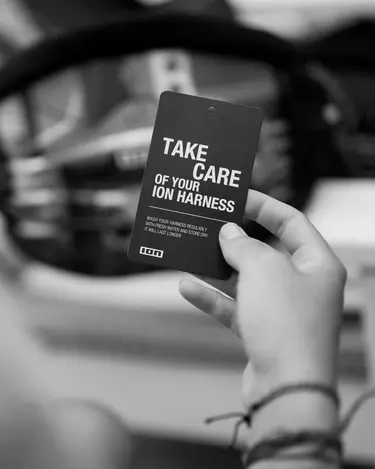
Your kite or windsurf harness is exposed to more than just regular wear and tear. Sun, salt water and moisture can take their toll on buckles, hooks and other components over time. Many small parts can be replaced without having to replace your entire harness. Learn how to repair and maintain your harness, replace worn components and find the right spare parts to keep your gear in good condition.
Important: Your harness is exposed to significant forces while riding. Before every session, check your harness for signs of wear or damage, paying particular attention to the straps, buckles, spreader bar, hook, and any safety release systems. Make sure all components are properly secured and functioning as intended.
Do not use a harness with damaged or excessively worn components that could affect its safety or performance. If you're unsure about its condition, have it checked by a qualified professional.
Table of content
How to Replace the C30 Adjustment Buckles on Your ION Harness
How to Remove the Safety Handle from Your ION Harness
How to Replace the Hook on Your ION Spreader Bar
How to Install a Mini Rope Slider on Your ION Spreader Bar
Where to Find Spare Parts for Your ION Harness
How to Clean and Care for Your Kite or Windsurf Harness

Step 1: Remove the Adjustment Strap
Push the buckle cover aside to access the C30 adjustment buckle. Press the release lever and pull the webbing strap out of the buckle.
Tip: Tuck the cover underneath the buckle to keep it out of the way while working.
Step 2: Unscrew the Old Buckle
Use a Phillips screwdriver or the multi-tool supplied with your ION harness to loosen the screw at the top of the buckle.
Carefully remove the screw, making sure not to lose the small counter nut.
Step 3: Remove the Pin and Buckle
Use the screwdriver to gently push the pin out from the opposite side. Once the pin is loose, remove it completely and detach the old C30 adjustment buckle from the harness.
Step 4: Prepare the Replacement Buckle
Take your new C30 adjustment buckle and remove its screw and pin in the same way.
Be careful not to lose the counter nut, as you'll need it to secure the new buckle.
Step 5: Attach the New Buckle
Position the replacement buckle over the webbing loop on your harness.
Align the openings and carefully push the pin through the buckle and webbing loop from the top.
Make sure the counter nut is correctly positioned.
Step 6: Tighten the Screw
Use your Phillips screwdriver to tighten the screw and secure the new buckle in place.
Check that the buckle is firmly attached and the screw is properly secured.
Step 7: Reinsert the Adjustment Strap
Press the release lever on the new buckle and thread the webbing strap back through.
Make sure the strap is correctly positioned and can be adjusted as intended.
Step 8: Replace the Buckle Cover
Slide the protective buckle cover back into place, making sure the buckle and webbing are properly positioned underneath.
Your new C30 adjustment buckle is now installed.
Important: Before using your harness, check that the buckle is securely attached, the screw is tightened and the adjustment strap is correctly threaded. Test the adjustment mechanism and make sure the webbing stays firmly in place under tension. Do not use the harness if any component is loose, damaged or not functioning correctly.


Step 1: Unthread the Lower Adjustment Strap
Locate the two adjustment buckles on one side of your ION harness. Push the protective buckle cover aside to access the lower buckle.
Release the buckle and carefully pull the webbing strap out.
Step 2: Push the Buckle Behind the Cover
Gently stretch the neoprene buckle cover with your fingers and push the adjustment buckle through to the back of the cover.
This creates more space to remove the safety handle.
Step 3: Repeat on the Other Side
Move to the opposite side of your harness and repeat the process.
Unthread the lower adjustment strap, stretch the buckle cover and push the adjustment buckle behind it.
Step 4: Release the First Side of the Safety Handle
Locate the cord loop connecting the safety handle to the adjustment buckle.
Carefully guide the loop over the buckle until it comes free. This may take a little patience, as the loop can fit tightly around the buckle.
Step 5: Remove the Safety Handle
Move to the other side of the harness and gently push the neoprene buckle cover aside.
Guide the second cord loop over the adjustment buckle to release it.
The safety handle is now completely detached from your harness.
Step 6: Reposition the Adjustment Buckles
To reassemble your harness, push both adjustment buckles back through their neoprene covers until they are visible and accessible again.
Make sure the buckles are correctly positioned before rethreading the straps.
Step 7: Rethread the Adjustment Straps
Carefully thread the webbing strap through the adjustment buckle in the correct order:
Feed the strap through the rear opening of the buckle.
Guide it back through the front opening.
This threading pattern allows the buckle to tighten and hold the webbing securely under tension.
Important: Make sure the strap follows the correct path through the buckle. Incorrect threading can prevent the adjustment mechanism from holding securely.
Step 8: Tighten and Secure the Straps
Pull the adjustment strap to tighten it and check that the buckle holds the webbing firmly in place.
Fold the excess webbing neatly and tuck it underneath the protective buckle cover.
Step 9: Repeat and Check Both Sides
Repeat the rethreading and tightening process on the opposite side of your harness.
Check that both adjustment straps are correctly threaded, securely tightened and neatly stored under their covers.
Important Safety Notice: The safety handle may be part of your harness's safety setup. Only remove it if the configuration is approved for your specific harness model and intended use. Before your next session, make sure all adjustment straps are correctly threaded, both buckles hold securely under tension, and any required safety or release systems remain fully functional. If you're unsure, consult ION or an authorised dealer before using the harness.


Important: Only use compatible ION replacement parts. If your hook shows signs of damage or excessive wear, stop using the harness until the affected component has been replaced and checked.

Important: Make sure the mini rope or slider is compatible with your ION spreader bar. Always check that all components are securely installed and functioning correctly before heading out on the water.


When Can a Harness No Longer Be Repaired?
Not every damaged kite or windsurf harness needs replacing. Worn or damaged components, such as adjustment buckles or spreader bar parts, can often be replaced with compatible spare parts. However, damage to the harness's structural components, load-bearing straps, stitching or safety systems may compromise its safety and make further use unsafe.
Important: If you notice cracks, deformation, torn webbing, damaged stitching or malfunctioning safety components, stop using your harness immediately. Do not attempt to repair structural or safety-critical damage yourself. Contact ION or an authorised dealer to assess whether a repair is possible or the harness needs to be replaced.
Where to Find a Professional Harness Repair Shop
Not every kite or windsurf harness repair can be done yourself. If your harness shows signs of damage, excessive wear, or issues with safety-critical components, it's best to have it inspected by a professional. A qualified repair specialist can assess the damage and determine whether a repair is possible or if parts need to be replaced.
Regular professional inspections can also help identify potential issues early and keep your harness in good condition for your next session.